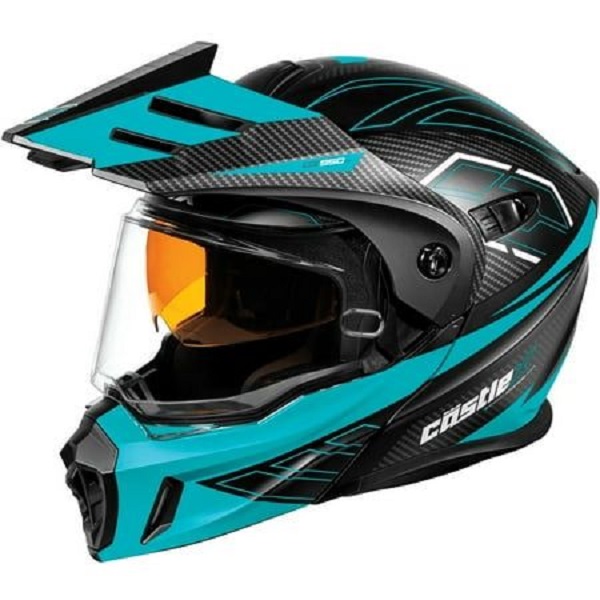
What Paint to Use for Motorcycle Helmet: A Comprehensive Guide
Motorcycle helmets are not just safety gear; they’re an expression of personal style. Choosing the right paint for your helmet can enhance its appearance and ensure its longevity. This guide will help you navigate the options and make an informed decision on what paint to use for your motorcycle helmet.
Understanding Helmet Paint Options
Types of Paint for Motorcycle Helmets
When it comes to painting motorcycle helmets, several types of paint are suitable. Each has its own advantages:
- Acrylic Paint: Acrylics are popular for their ease of use and quick drying times. They’re versatile and can be used on various surfaces, including helmets. However, they might not be as durable as other types of paint.
- Enamel Paint: Known for its durability and glossy finish, enamel paint is a great choice for helmets. It provides a hard, long-lasting coat but takes longer to dry and may require a primer.
- Auto Paint: Designed for vehicles, auto paint offers exceptional durability and a high-quality finish. It’s ideal for those looking for a professional-grade appearance and long-term protection.
Choosing the Right Paint for Your Helmet
Selecting the best paint for your helmet involves considering several factors:
- Durability: Auto and enamel paints generally offer better durability compared to acrylics.
- Finish: Decide whether you want a glossy, matte, or satin finish. Each type of paint provides different aesthetic results.
- Application: Some paints require specialized application techniques. Ensure you have the right tools or seek professional help if needed.
Preparing Your Helmet for Painting
Cleaning and Prepping the Surface
What paint to use for motorcycle helmet? Proper preparation is crucial for a successful paint job. Follow these steps:
- Clean Thoroughly: Remove any dirt, grease, or existing decals from the helmet. Use a mild detergent and water, then dry completely.
- Sand the Surface: Lightly sand the helmet to create a rough surface that helps the paint adhere better.
- Apply Primer: A primer ensures better adhesion of the paint and provides a smoother surface. Choose a primer compatible with your chosen paint type.
Masking and Protection
To ensure clean lines and protect areas you don’t want to paint:
- Mask Off Areas: Use painter’s tape to cover vents, straps, and any other parts of the helmet you don’t want to paint.
- Protect the Surrounding Area: Cover your workspace with drop cloths to prevent paint splatters.
Painting Techniques and Tips
Application Methods
Different painting methods can affect the final result:
- Spray Painting: Ideal for achieving an even coat and smooth finish. Hold the spray can about 6-8 inches from the surface and use light, even strokes.
- Brush Painting: Suitable for detailed work or smaller areas. Use high-quality brushes to avoid streaks and achieve a clean finish.
- Airbrushing: Offers precision and the ability to create intricate designs. This method requires a bit more skill and practice.
Drying and Curing
Allow the paint to dry properly to avoid smudges or damage:
- Drying Time: Follow the manufacturer’s instructions for drying times. Typically, acrylics dry quickly, while enamel and auto paints may take longer.
- Curing: Some paints require additional curing time to fully harden. Avoid using the helmet until the paint has completely cured.
Aftercare and Maintenance
Protecting Your Painted Helmet
To keep your helmet looking great:
- Avoid Harsh Chemicals: Use mild cleaners and avoid abrasive materials.
- Store Properly: Keep the helmet in a cool, dry place away from direct sunlight to prevent fading.
Touching Up
Minor scratches or chips can be fixed with touch-up paint. Ensure it matches the original color and follow similar preparation and application steps.
Professional vs. DIY Painting
Advantages of Professional Painting
- Expert Finish: Professionals provide a high-quality, durable finish.
- Custom Designs: Professionals can create complex designs and ensure a flawless application.
DIY Painting Benefits
- Cost-Effective: DIY painting is generally more affordable.
- Personalization: Allows you to create a unique, personalized design.
Choosing a Professional Painter
If you opt for professional help, consider these tips:
- Check Reviews: Look for feedback from previous clients to gauge quality.
- Portfolio: Review the painter’s previous work to ensure their style matches your vision.
Troubleshooting Common Issues
Common Painting Problems and Solutions
Even with careful preparation, issues can arise during painting. What paint to use for motorcycle helmet? Here’s how to address common problems:
- Peeling or Bubbling Paint: This usually results from inadequate surface preparation or application in humid conditions. Sand the area lightly, clean it, and reapply the paint in a well-ventilated area.
- Uneven Color or Finish: To fix unevenness, ensure you apply multiple thin layers of paint, allowing each coat to dry completely before applying the next. Use smooth, even strokes to achieve a consistent finish.
- Paint Drips or Runs: If you notice drips or runs, let the paint dry completely and then sand the area smooth. Reapply a thin, even layer of paint to correct the issue.
Environmental Considerations
Impact of Weather on Painting
Weather conditions can significantly affect the painting process:
- Temperature: Paints generally have an ideal temperature range for application. Check the manufacturer’s recommendations and avoid painting in extreme temperatures.
- Humidity: High humidity can cause paint to dry unevenly or lead to bubbling. Ensure you paint in a dry, well-ventilated area.
Safety Precautions
When painting, prioritize safety:
- Ventilation: Ensure your workspace is well-ventilated to avoid inhaling harmful fumes.
- Protective Gear: Wear a mask, gloves, and safety goggles to protect yourself from paint chemicals.
Enhancing Your Helmet’s Appearance
Adding Custom Designs and Decals
To make your helmet truly unique:
- Decals and Stickers: Add decals or stickers after painting for a personalized touch. Ensure the paint is fully cured before applying these additions.
- Custom Airbrushing: Consider hiring a professional for intricate airbrush designs that can add depth and detail to your helmet’s appearance.
Final Touches
Complete your helmet customization with a clear coat:
- Clear Coating: Apply a clear coat over your paint job to add shine and extra protection. Choose a clear coat compatible with your paint type for the best results.
Maintenance Tips for Painted Helmets
Long-Term Care
To maintain the appearance and durability of your painted helmet:
- Regular Cleaning: Clean your helmet regularly using mild soap and water. Avoid harsh chemicals that can damage the paint.
- Inspect for Damage: Periodically check for any signs of wear or damage and address issues promptly to prevent further deterioration.
Repainting and Refreshing
Over time, you may need to refresh your helmet’s paint:
- Repainting: If the paint becomes worn or chipped, consider a full repaint to restore its appearance. Follow the same preparation and application steps for a consistent look.
Comparing DIY and Professional Results
Evaluating Your Work
After completing your helmet paint job, compare it to professional results:
- Finish Quality: Check for smoothness and consistency. Professional jobs often have a more flawless finish due to specialized equipment and techniques.
- Durability: Assess how well the paint holds up over time compared to professional applications.
Making the Right Choice
Decide whether to continue with DIY painting or opt for professional services based on your results and satisfaction with the outcome.
Advanced Painting Techniques
Airbrushing for a Professional Finish
For a high-end, professional look, consider using airbrushing techniques:
- Precision: Airbrushing allows for intricate designs and smooth gradients. This technique can create detailed artwork or subtle color transitions on your helmet.
- Equipment: Invest in a good-quality airbrush and compressor. Practice on test surfaces to get a feel for the equipment and achieve the desired effect on your helmet.
Layering Paint for Depth
To add depth and dimension to your helmet:
- Base Layer: Start with a solid base color. This will act as the foundation for any additional layers.
- Additional Layers: Apply different colors or effects in layers. Each layer should dry completely before the next one is applied to avoid mixing and ensure clarity in your design.
Choosing the Right Finish
Matte vs. Glossy
What paint to use for motorcycle helmet? The finish of your paint can dramatically change the look of your helmet:
- Matte Finish: Provides a non-reflective surface that can give your helmet a sleek, modern appearance. It’s less prone to showing fingerprints and smudges.
- Glossy Finish: Offers a shiny, reflective surface that enhances color vibrancy and can make your helmet stand out more. It requires more maintenance to keep it looking pristine.
Specialty Finishes
Explore specialty finishes for unique effects:
- Metallic Paint: Contains metal flakes that reflect light and create a shimmering effect. Perfect for a striking, eye-catching look.
- Pearlescent Paint: Shifts color depending on the angle of light, providing a dynamic, multi-dimensional appearance.
Customizing with Decals and Wraps
Using Decals
Decals can add a personalized touch to your helmet:
- Application: Apply decals once the base paint is fully cured. Ensure the surface is clean and dry before sticking the decals.
- Removal: To change designs, carefully peel off decals and clean any residue before applying new ones.
Helmet Wraps
For a temporary or reversible customization:
- Types of Wraps: Choose from vinyl wraps, which can cover your helmet in a wide range of colors and designs. They are easy to apply and remove.
- Application: Wraps should be applied by smoothing out bubbles and creases to ensure a professional appearance. Use a heat gun to help with application and shaping.
Conclusion
Choosing the right paint for your motorcycle helmet is essential for both aesthetics and protection. Whether you decide on acrylic, enamel, or auto paint, proper preparation and application will ensure a high-quality finish. By following the steps outlined in this guide, you can achieve a durable and stylish helmet that reflects your personal taste.